How to Host a React App on an EC2 Instance: A Step-by-Step Guide
Full-Stack Developer | MERN + Next.js | DevOps & Cloud Enthusiast
I specialize in building dynamic web applications using the MERN stack and Next.js. Currently exploring DevOps and cloud technologies to streamline workflows, automate deployments, and optimize cloud infrastructure for scalable, efficient solutions.
Hosting your React app on an EC2 instance is a great way to have more control over your web application’s infrastructure. In this guide, I'll walk you through each step, from setting up the EC2 instance to deploying your app. Whether you're a beginner or have some experience, this guide is for you!
Prerequisites
Before we dive in, make sure you have the following:
A basic React app ready to deploy.
An AWS account.
Basic knowledge of SSH, Linux commands, and AWS services.
Step 1: Create an EC2 Instance
Log into your AWS Console
Go to the AWS Management Console and log in to your account.Navigate to EC2
From the AWS Console, search for EC2 and click on Launch Instance.Configure the Instance
Choose an Amazon Machine Image (AMI): Select the latest version of Ubuntu (20.04 or higher).
Choose Instance Type: For most basic projects, a t2.micro instance (eligible for free tier) works fine.
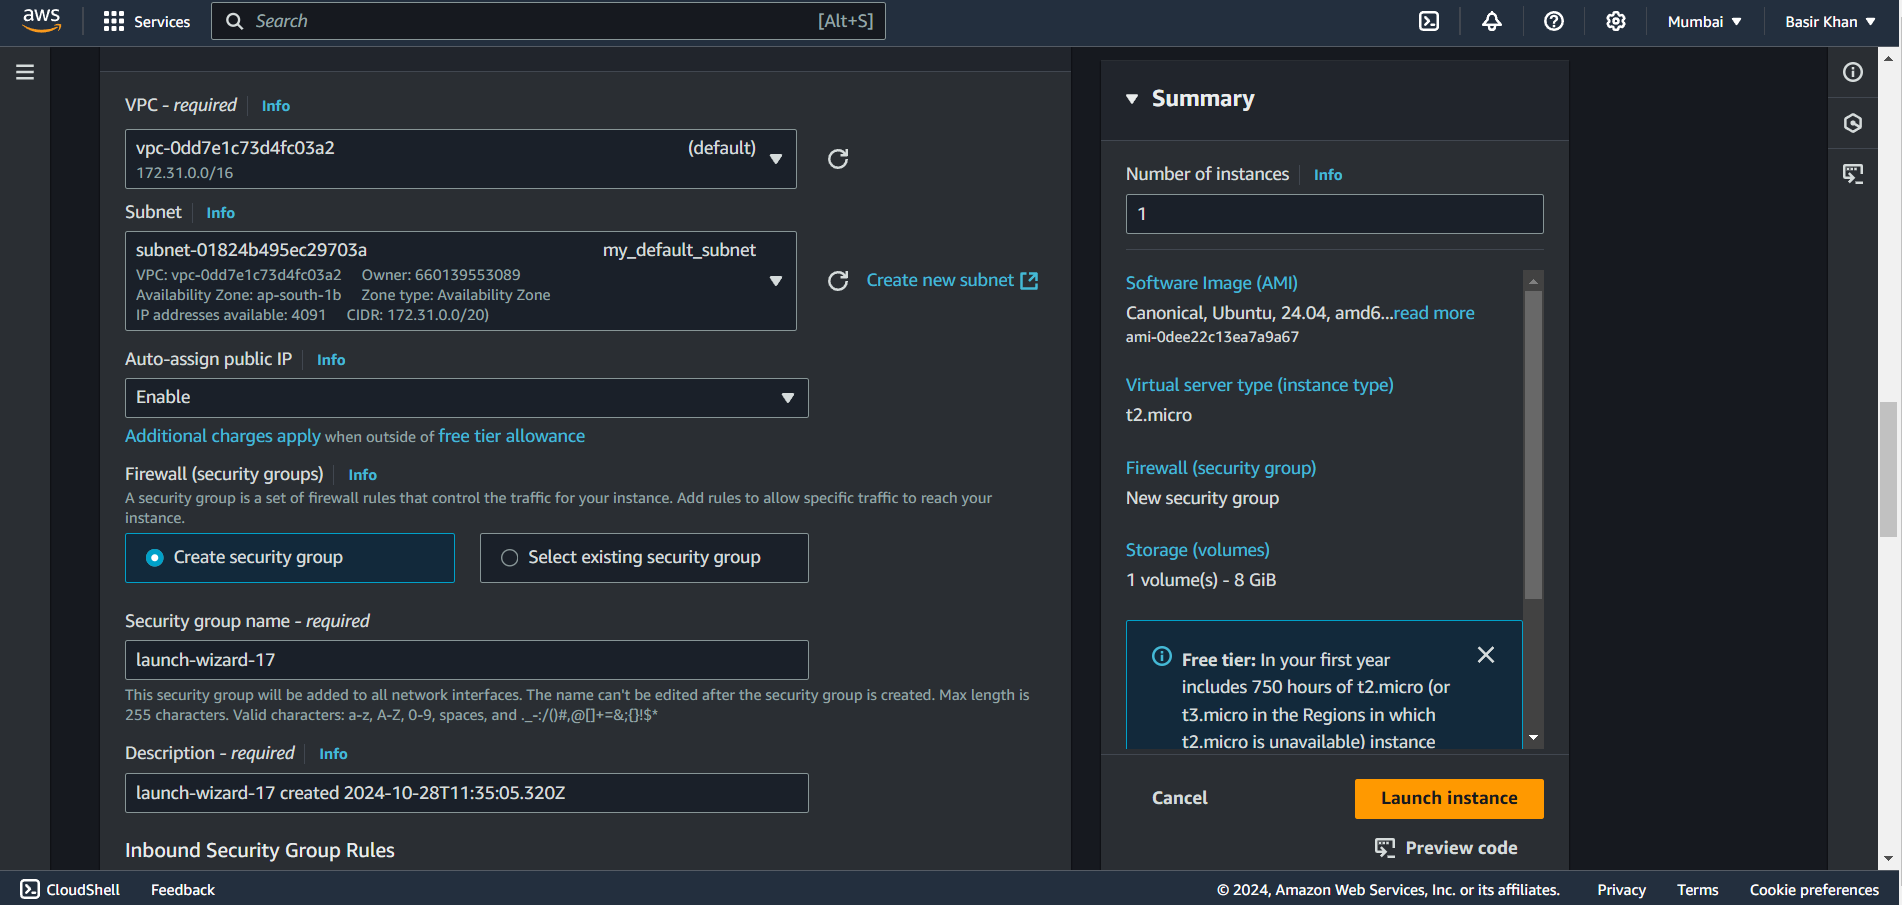
Configure Instance Details: Keep the default settings.
Add Storage: Stick with the default size unless your app requires more space.
Add Tags: This is optional, but you can tag your instance for easy identification.
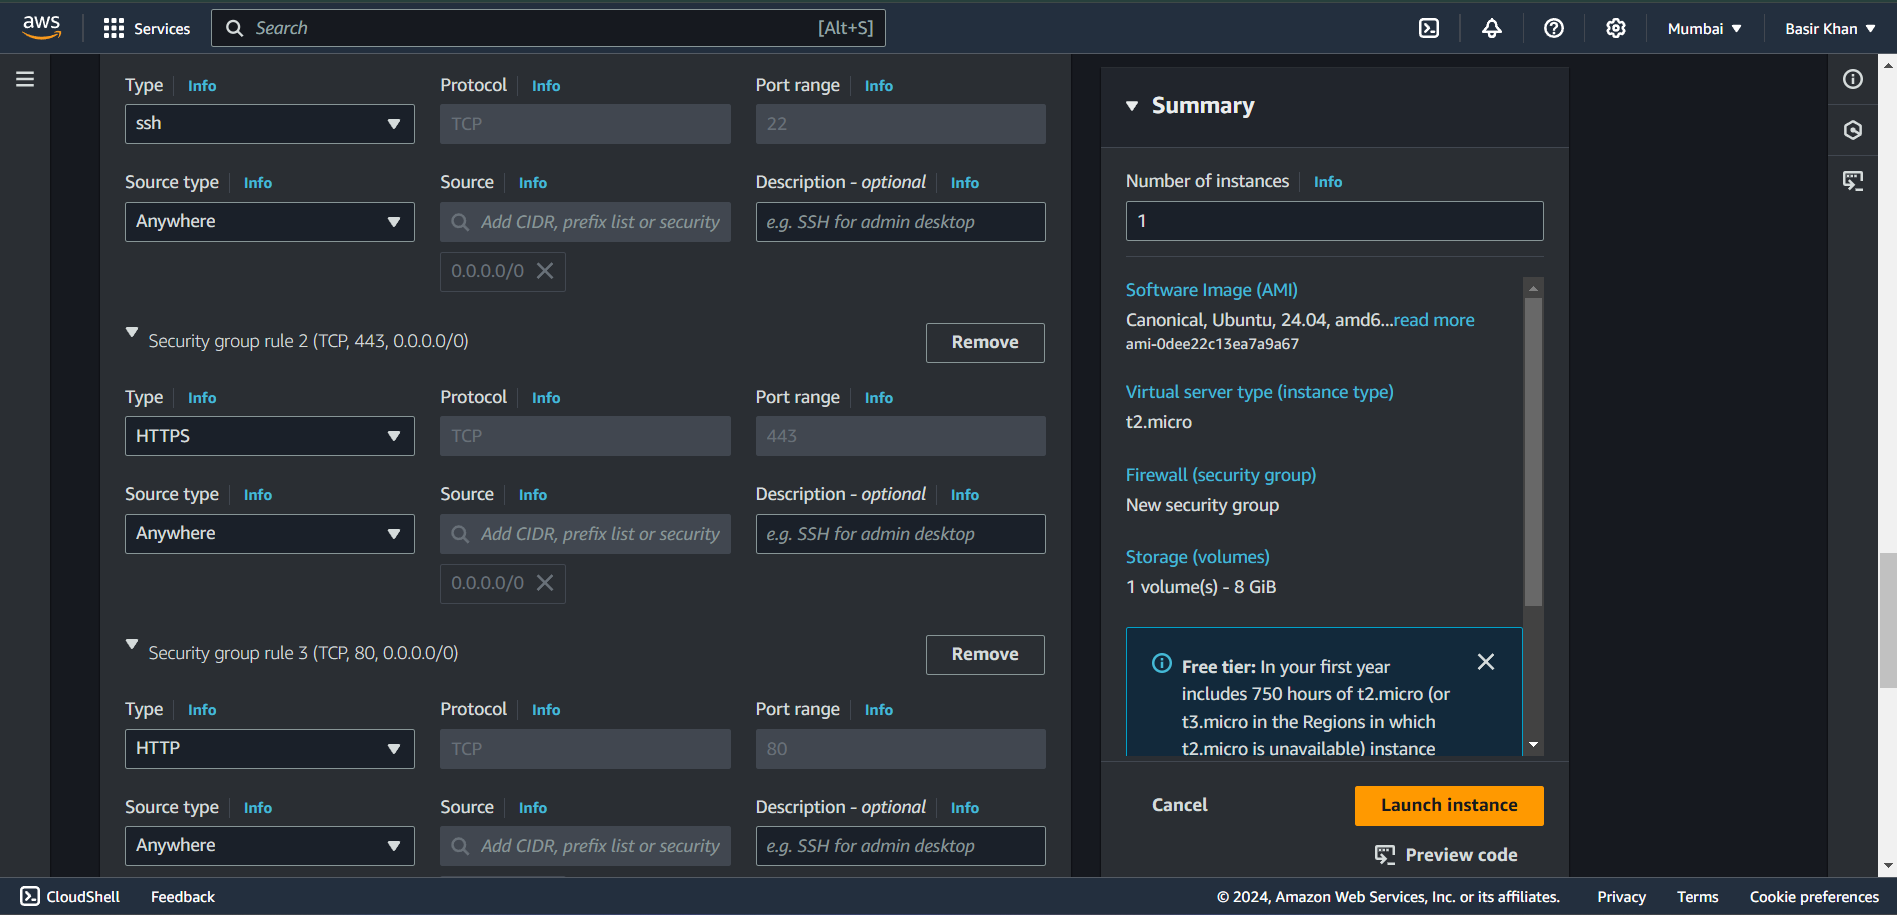
Configure Security Group: Allow the following:
HTTP (port 80) for web access
SSH (port 22) for remote login
HTTPS (port 443) if you plan to use SSL.
Launch the Instance
Choose or create a new key pair to SSH into your instance, then launch the instance. Your EC2 instance will take a few moments to spin up.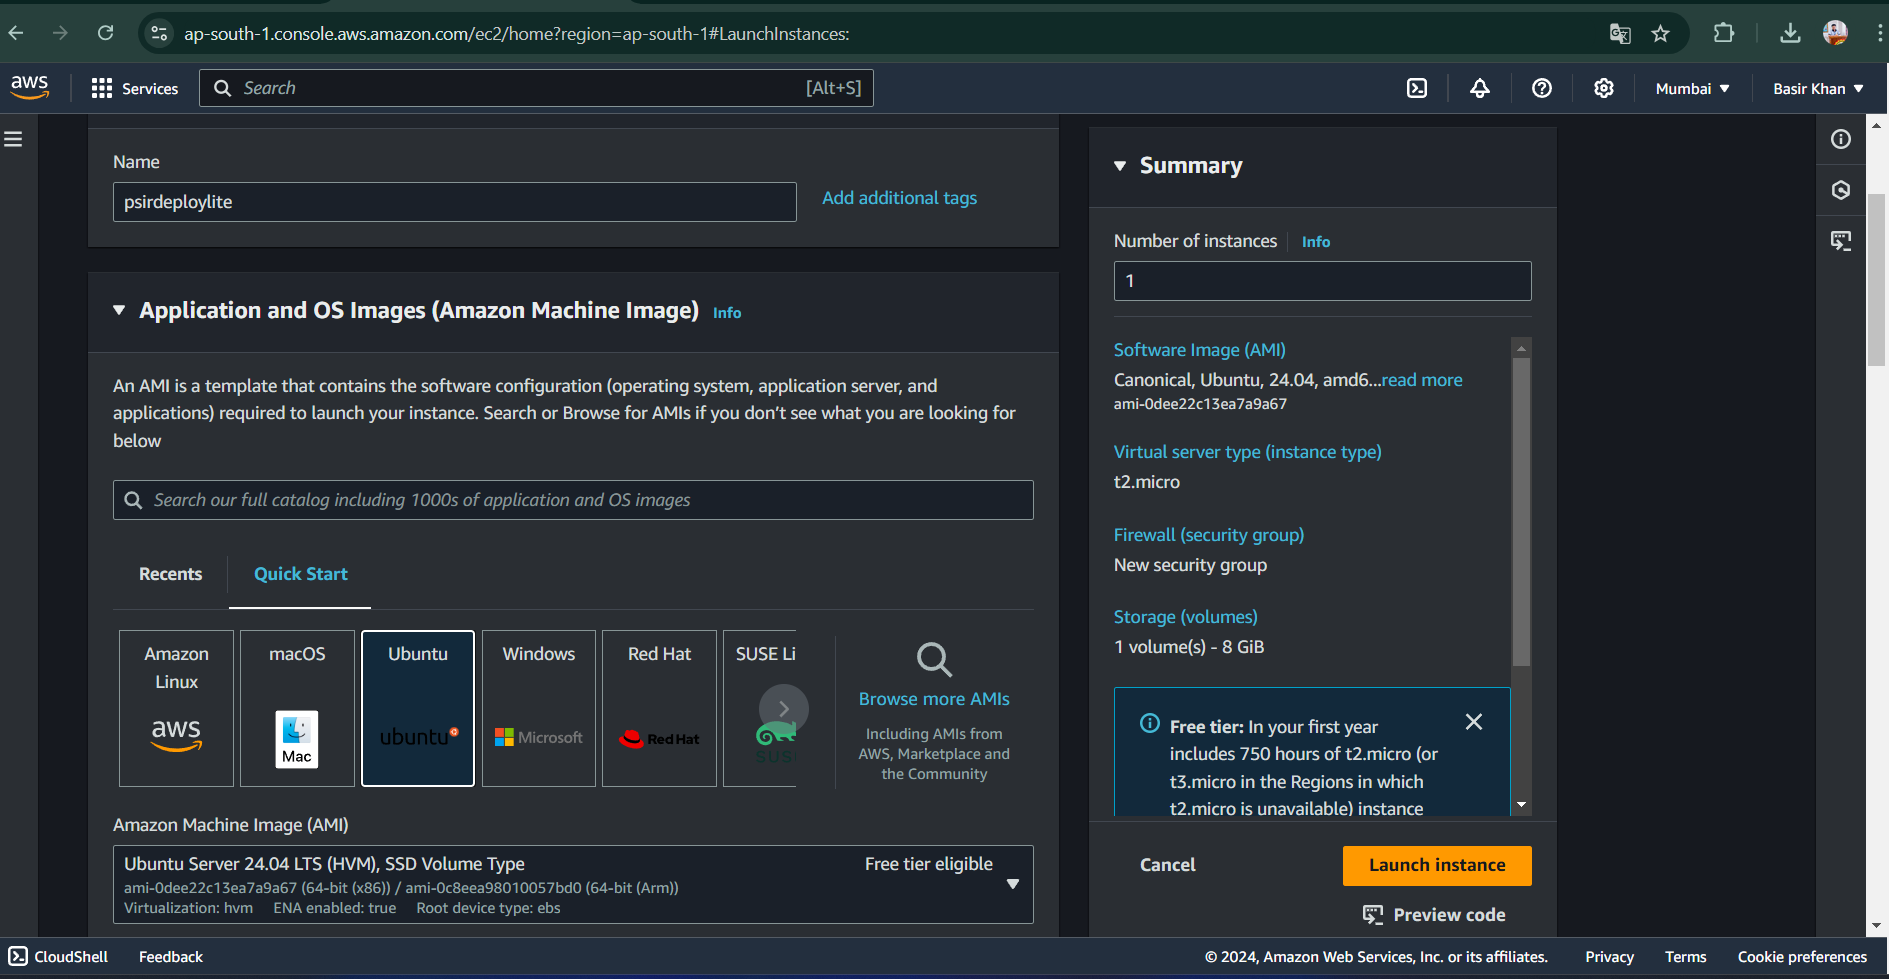
Step 2: Connect to Your EC2 Instance
Download your private key (.pem file)
Ensure you have the.pemfile of the key pair you created earlier.Connect via SSH
Open your terminal (or Git Bash on Windows) and run the following command to SSH into your EC2 instance:chmod 443 "path_to_your_pem_file.pem"ssh -i "path_to_your_pem_file.pem" ubuntu@your_ec2_public_ipReplace
path_to_your_pem_file.pemwith the location of your.pemfile andyour_ec2_public_ipwith your EC2 instance’s public IP address (available in the EC2 dashboard).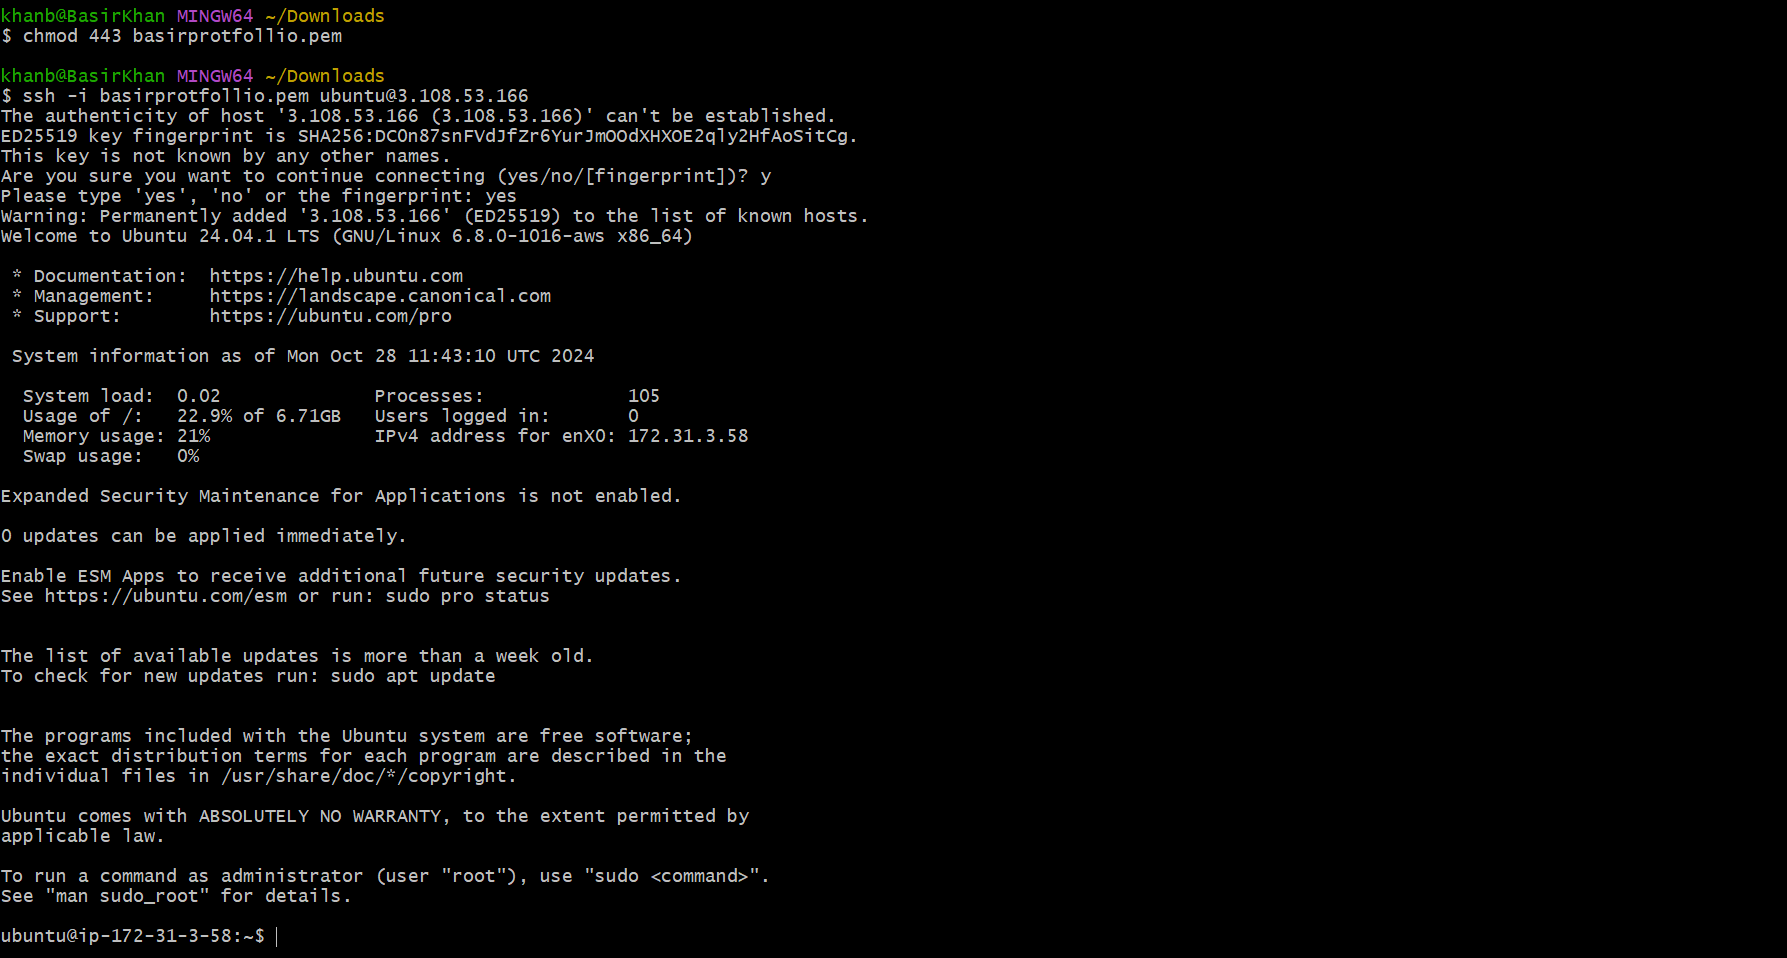
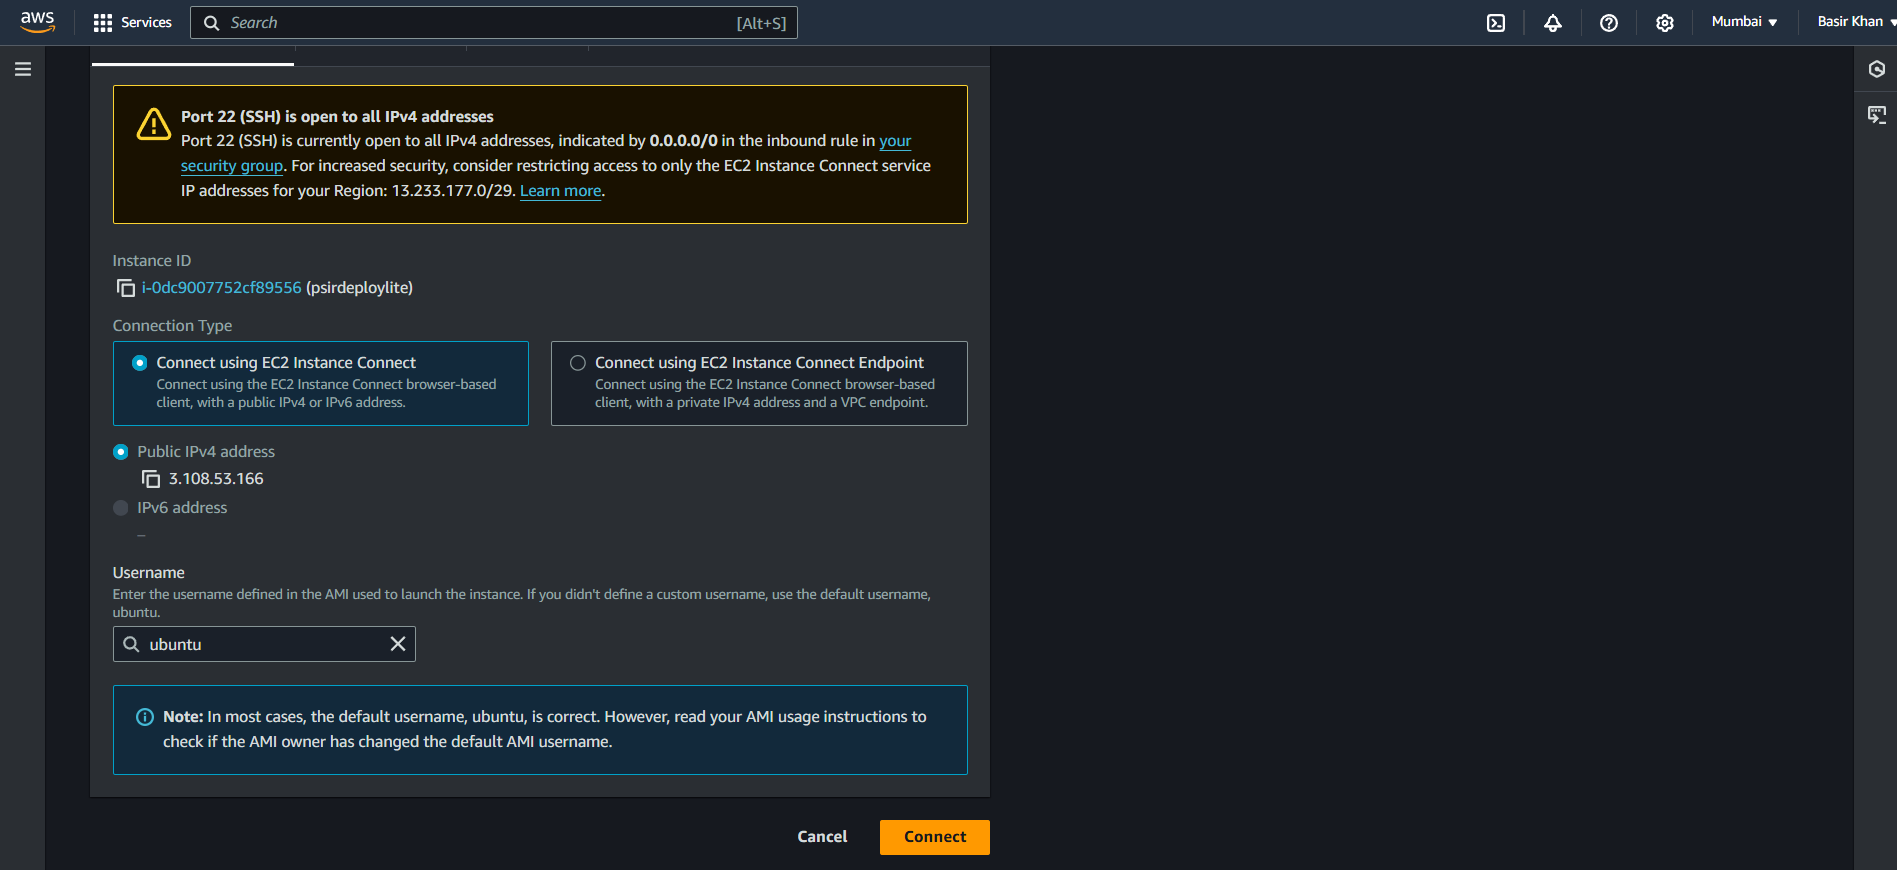
Option 2: Connecting Through AWS Console
If you're unfamiliar with SSH or facing issues, you can also connect directly through the AWS Console:
In your EC2 dashboard, select your instance.
Click on the Connect button at the top.
Choose EC2 Instance Connect, and you can connect directly from the browser without needing a private key.

Step 3: Update and Install Dependencies
Once you’re inside your EC2 instance, it’s time to install the required software.
Update the system packages:
sudo apt update && sudo apt upgrade -yInstalling Node Using the Node Version Manager: React apps run on Node.js, so we need to install it.
curl -o- https://raw.githubusercontent.com/nvm-sh/nvm/v0.39.3/install.shcurl -o- https://raw.githubusercontent.com/nvm-sh/nvm/v0.39.3/install.sh | bashsource ~/.bashrcnvm install v20.9.0You can check the versions installed with:
 node -v
 npm -v
Install Nginx:
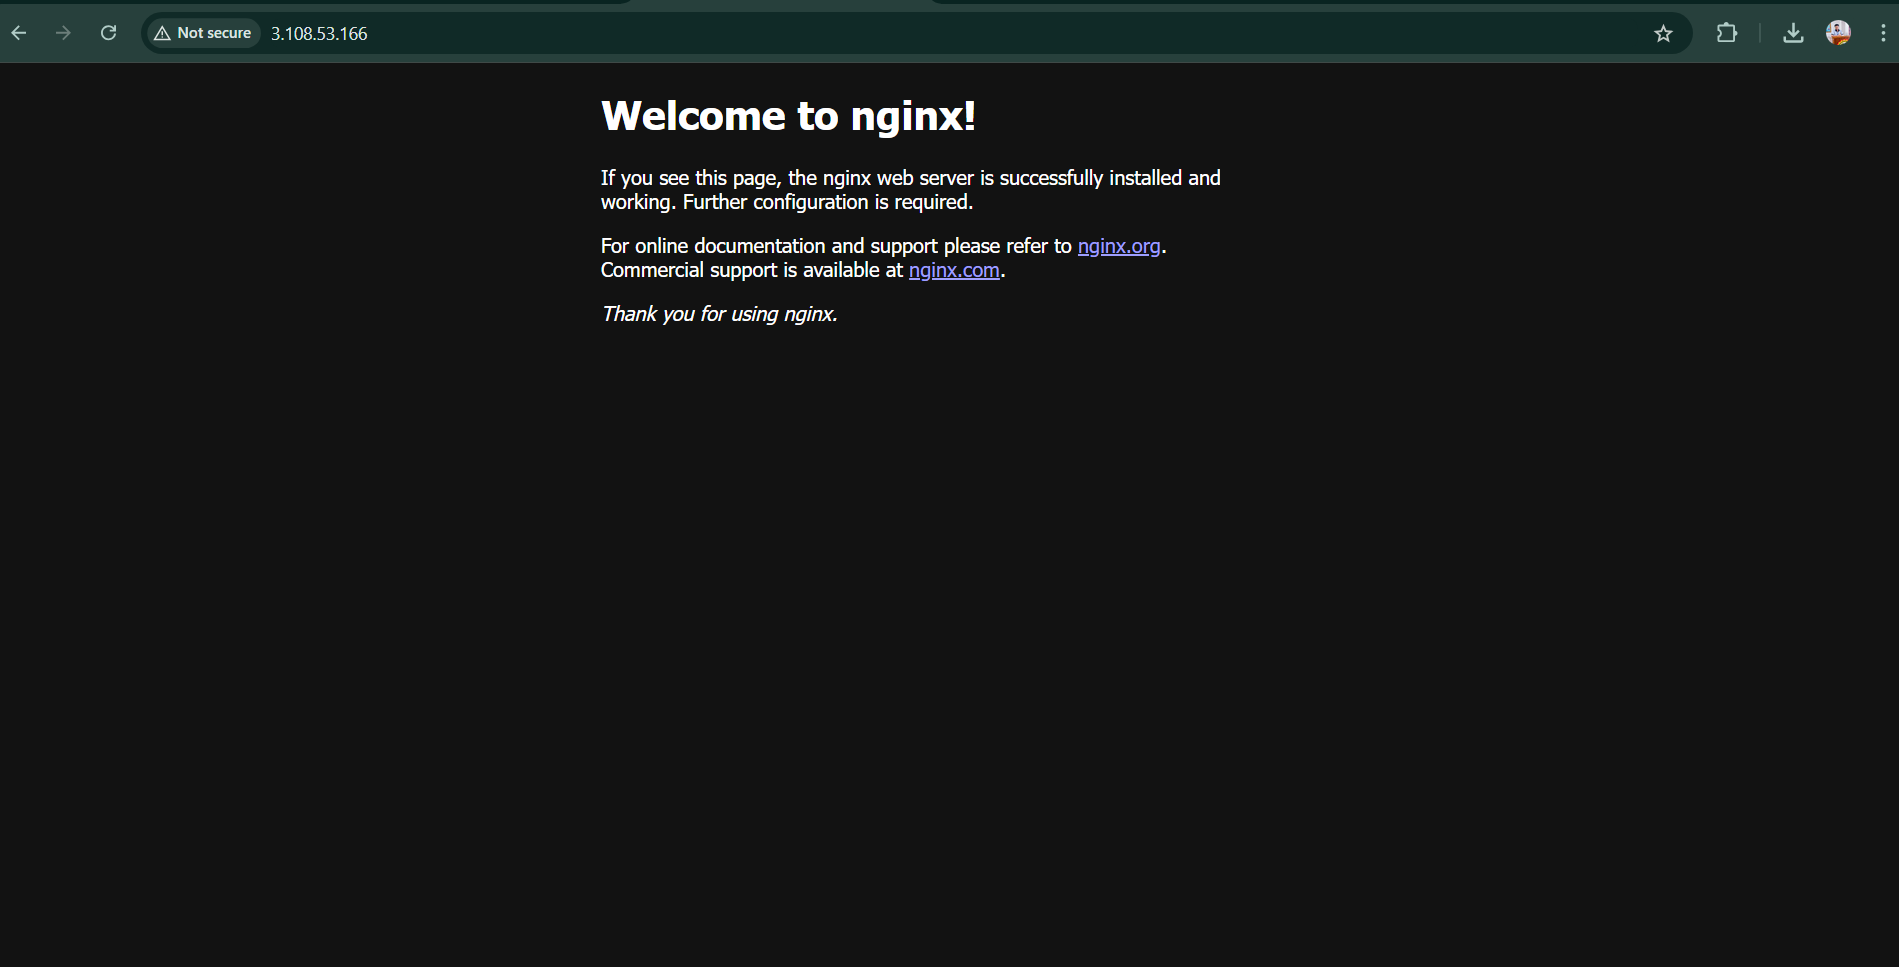
Nginx will be used as a reverse proxy to serve your React app.sudo apt install nginx -yStart Nginx and enable it:
 sudo systemctl start nginx
 sudo systemctl enable nginx
You can check if Nginx is working by navigating to your EC2 instance’s public IP in a browser. You should see the default Nginx welcome page.
Step 4: Configure Firewall Rules
Open necessary ports:
Make sure your security group allows incoming traffic on HTTP (port 80). You can modify this from the AWS EC2 console under Security Groups.- 💡We have done this step while creating ec2 instance in this blog.
Step 5: Deploy Your React App
Now it's time to get your React app onto the server.
Clone your React app from GitHub:
First, install Git:
sudo apt install git -yThen, clone your app:
git clone https://github.com/your-username/your-react-app.gitNavigate to your app directory:
cd your-react-app
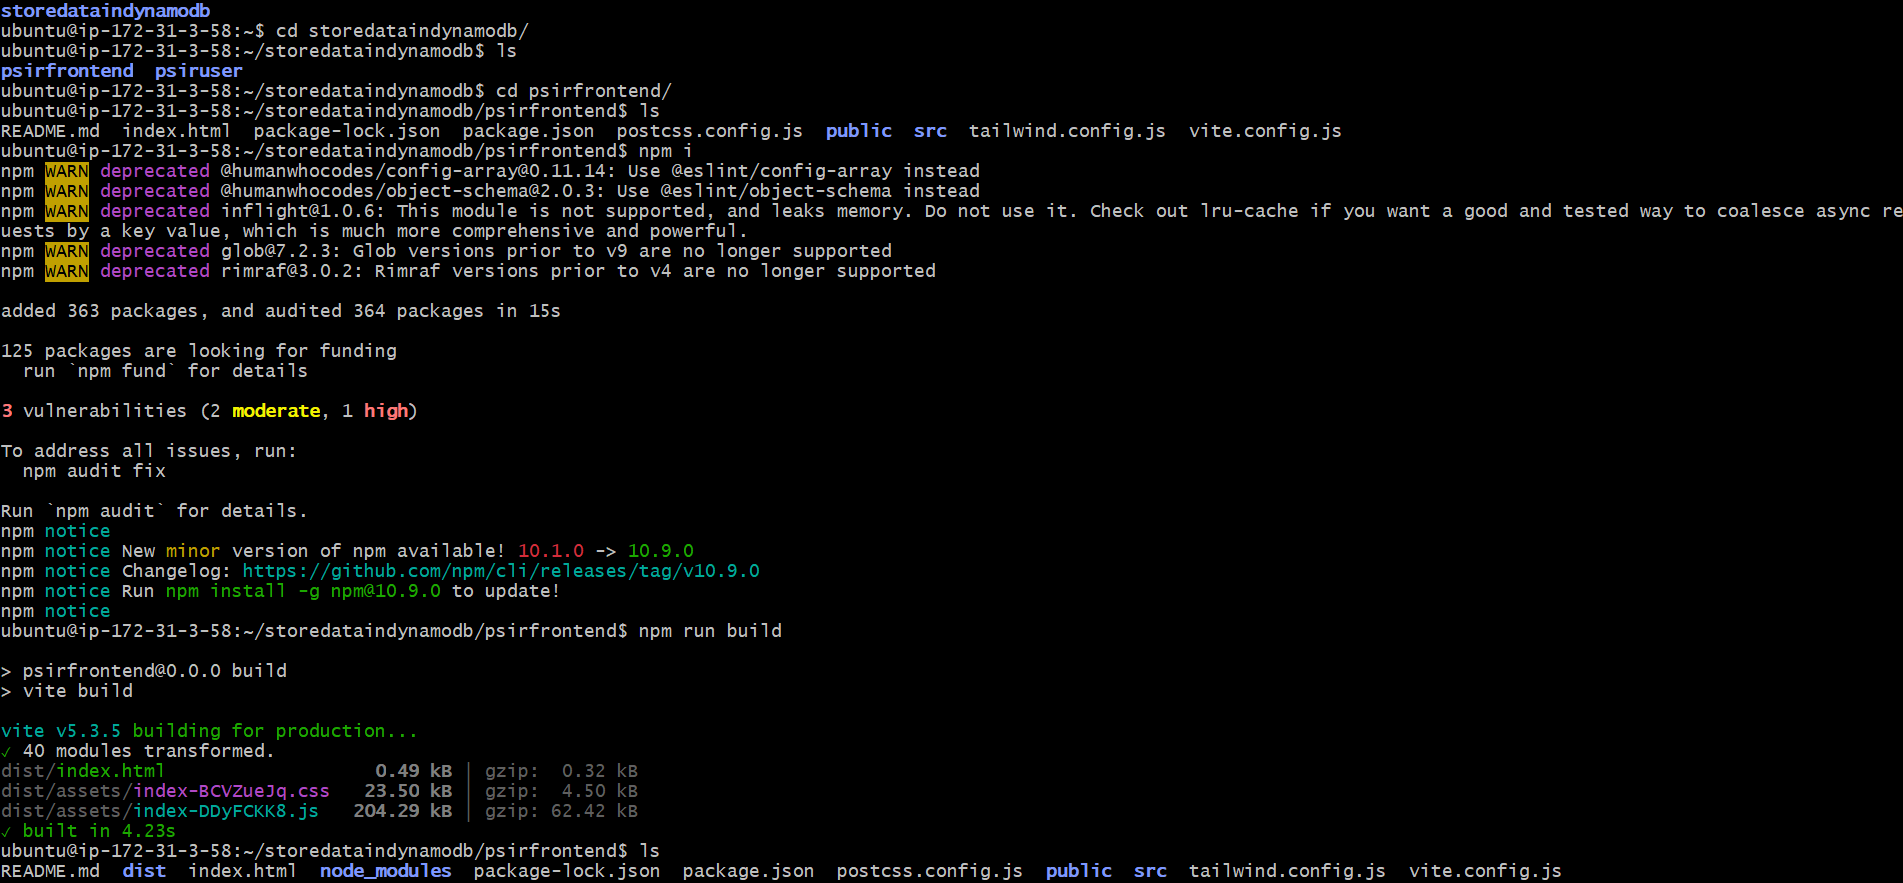
Install the dependencies:
npm installBuild your React app:
npm run buildThis command creates a production-ready version of your React app in the build/dist folder.
Step 6: Configure Nginx to Serve the React App
Remove the default Nginx configuration:
sudo rm /etc/nginx/nginx.confCreate a new Nginx configuration file for your React app:
sudo vi /etc/nginx/nginx.confAdd the following configuration:
 events {
     # Event directives...
 }

 http {
     server {
     listen 80;
     server_name "your public ip";

     location / {
         proxy_pass http://localhost:{PORT LIKE 8080};
         proxy_http_version 1.1;
         proxy_set_header Upgrade $http_upgrade;
         proxy_set_header Connection 'upgrade';
         proxy_set_header Host $host;
         proxy_cache_bypass $http_upgrade;
     }
     }
 }
Reload Nginx
sudo nginx -s reload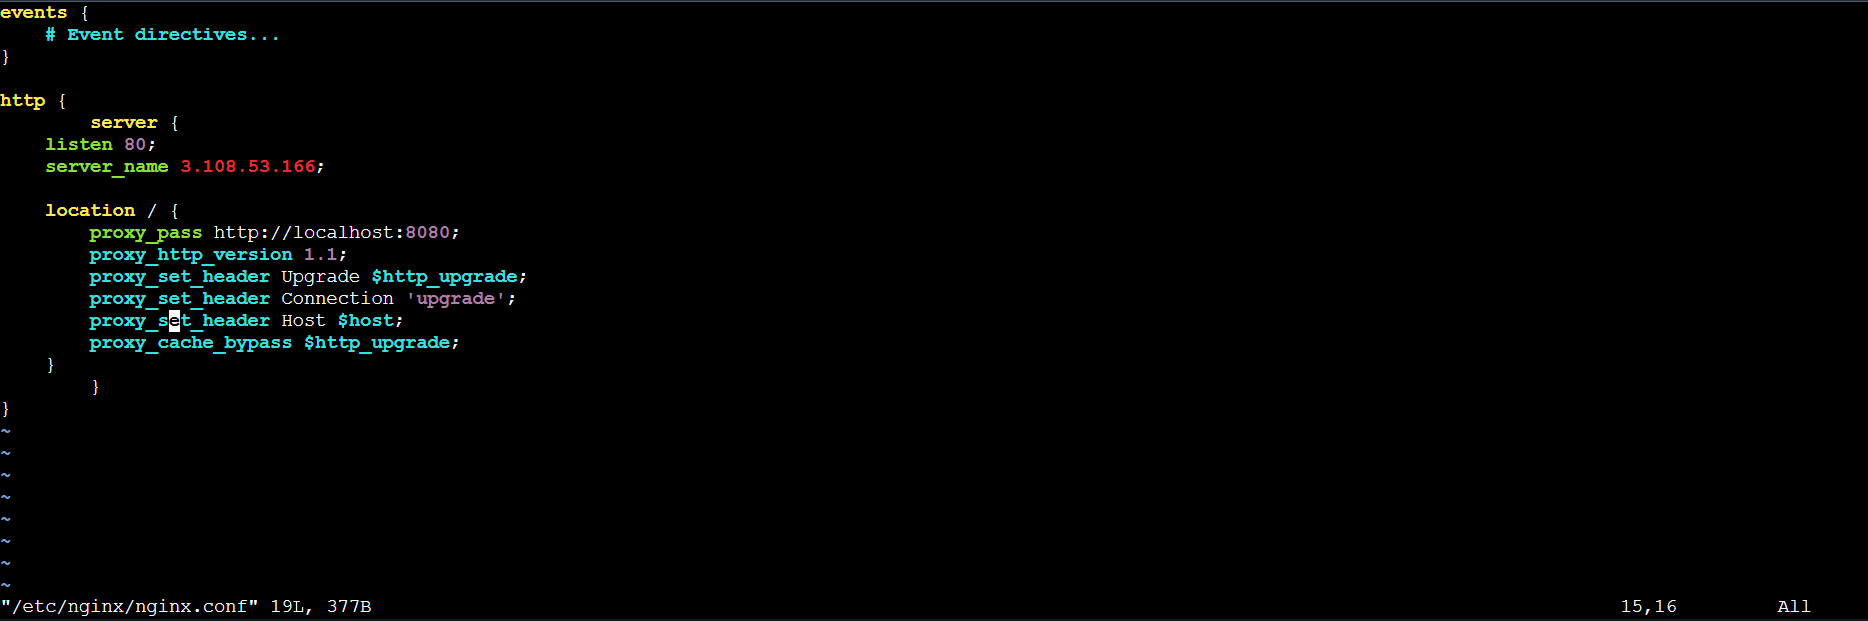
Step 7: Start your react app
Before starting the app we have to install some dependecies.
1. PM2 (Process Manager 2):
PM2 is a production-ready process manager for Node.js applications. It allows you to run, manage, and monitor Node.js processes in the background. Key features include:
Process management: Easily start, stop, restart, and manage multiple Node.js applications.
Monitoring: Provides real-time logs, metrics, and performance monitoring.
Load balancing: Automatically balances load across multiple CPU cores for better performance.
Startup scripts: Automatically restarts apps on crashes or server reboots.
Installation:
npm install -g pm2
2. Serve:
Serve is a simple and lightweight HTTP server designed to serve static files, such as the dist folder generated by build tools like React. It's ideal for quickly serving a single-page application (SPA) or static content.
Key features include:
Easy static file hosting: Serve static files from any folder with a single command.
Single-page application (SPA) support: Perfect for apps like React, with fallback routing.
Lightweight and fast: Minimal setup for quick static file hosting.
Installation:
npm install -g serve
These two libraries together allow you to serve static content (like a React app) and manage its processes efficiently in a production environment.
3 .Finally starting the react app
cd "your react app folder"
pm2 start "serve -s dist -l 8080" --name react-app

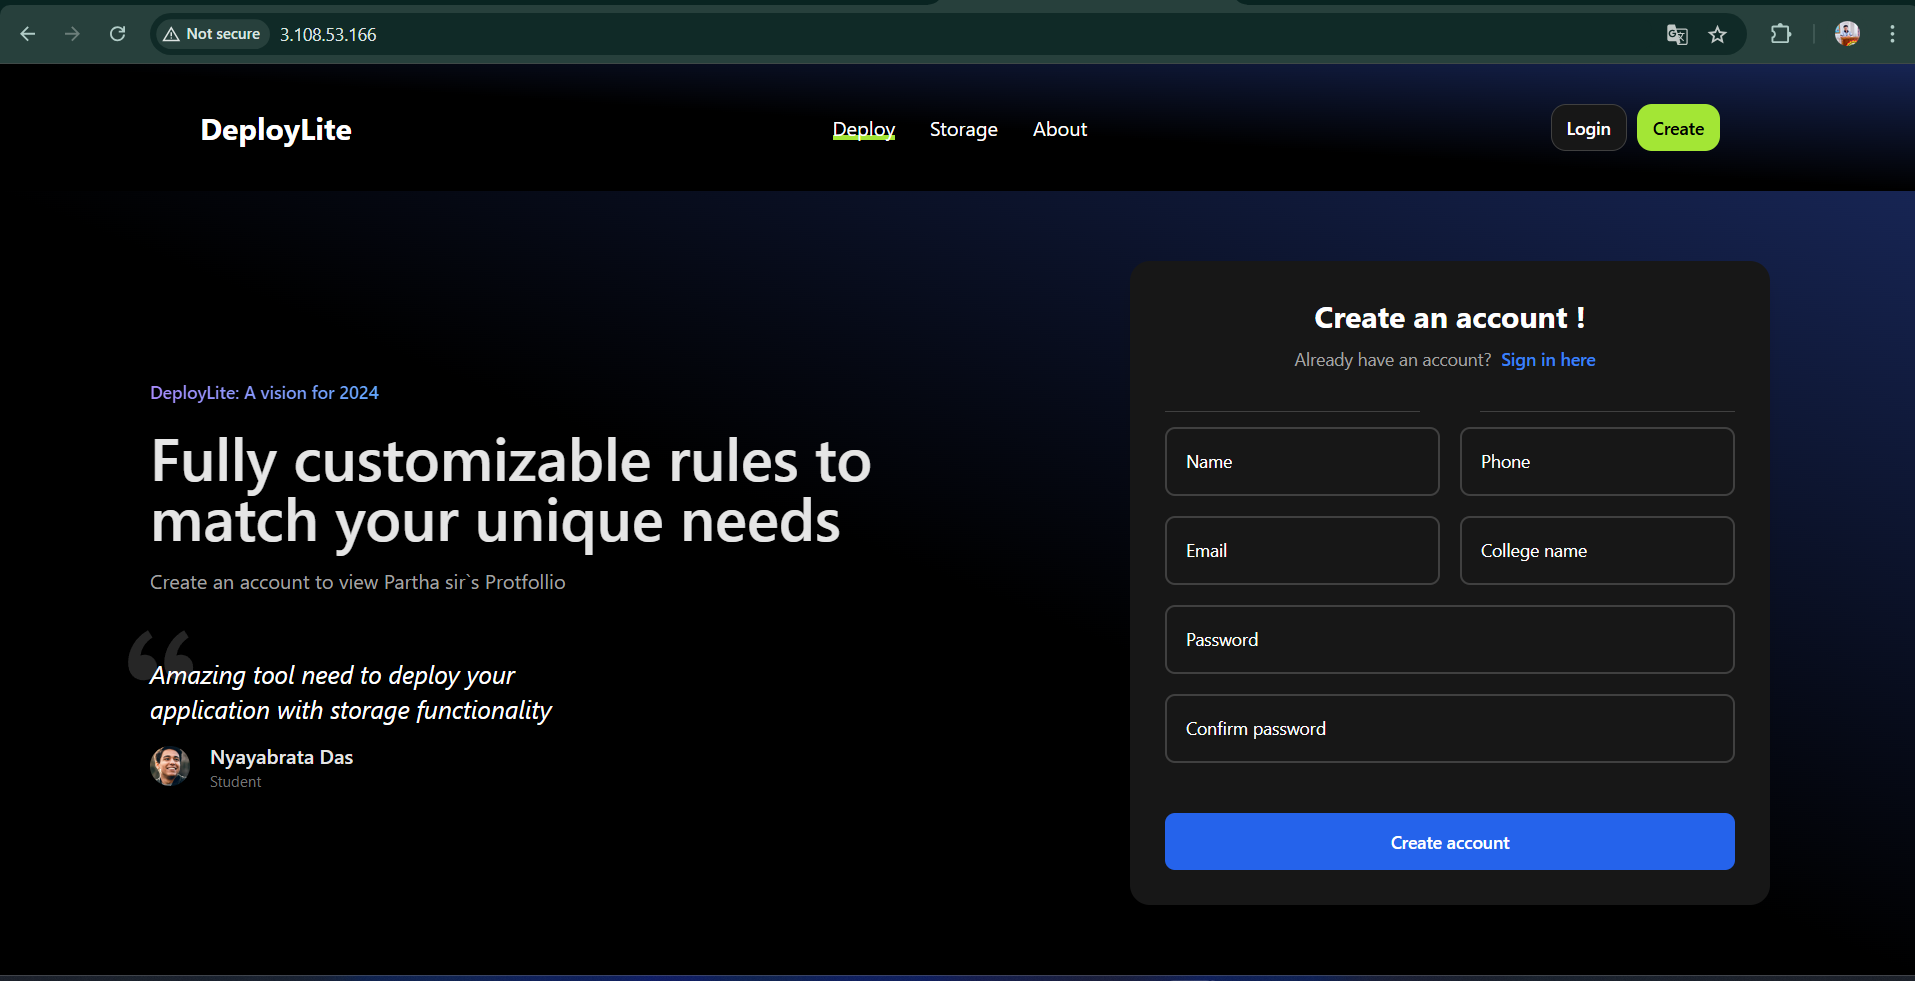
Step 8: Access Your React App
Now, when you navigate to your EC2 instance’s public IP in a browser, you should see your React app running!
Bonus: Add a custom domain to your app.
Login to your domain name provider and add a “A” Record with your corresponding to the public ip.
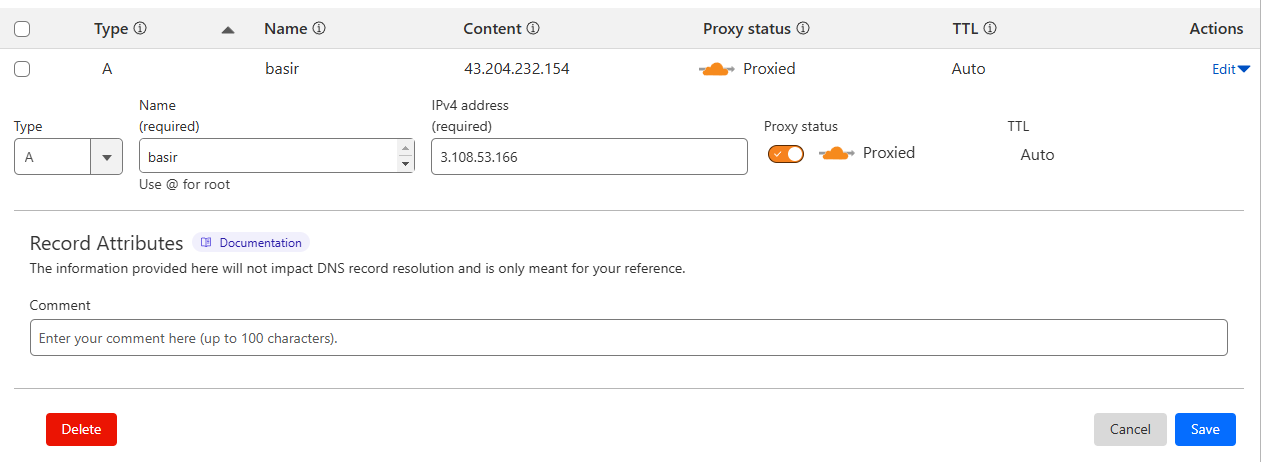 💡In my case, I am using Cloudflare for managing DNS, so I don't need to add an SSL certificate. However, if you're not using Cloudflare, please secure your app by adding an SSL certificate through Let's Encrypt or AWS Certificate Manager.
Update your Nginx configuration (Optional)
 events {
     # Event directives...
 }

 http {
     server {
     listen 80;
     server_name "your domain name";

     location / {
         proxy_pass http://localhost:{PORT LIKE 8080};
         proxy_http_version 1.1;
         proxy_set_header Upgrade $http_upgrade;
         proxy_set_header Connection 'upgrade';
         proxy_set_header Host $host;
         proxy_cache_bypass $http_upgrade;
     }
     }
 }
Conclusion
That’s it! 🎉 You’ve successfully hosted your React app on an EC2 instance. By following these steps, you’ve learned how to:
Set up an EC2 instance.
Install necessary dependencies (Node.js, npm, Nginx).
Deploy a React app using Nginx as a reverse proxy.
Optionally, add a custom domain to your app.